Tools
On the left of Pixen document windows, you'll find the Tools palette which contains all of Pixen's tools such as the Pencil, Eraser, Flood Fill, and more. A different tool can be assigned to the left mouse button and right mouse button. For example, you can configure Pixen to draw with the Pencil tool while holding the left mouse button and erase pixels while holding the right mouse button. To set the right tool, expand the Right Tool pane. The L / R buttons control whether the tool properties shown are for the left or right tool. Similarly, a different color can be assigned to the left and right tool via the color well.
All of Pixen's tools are detailed below.
![]() Pencil
Pencil
 Pencil
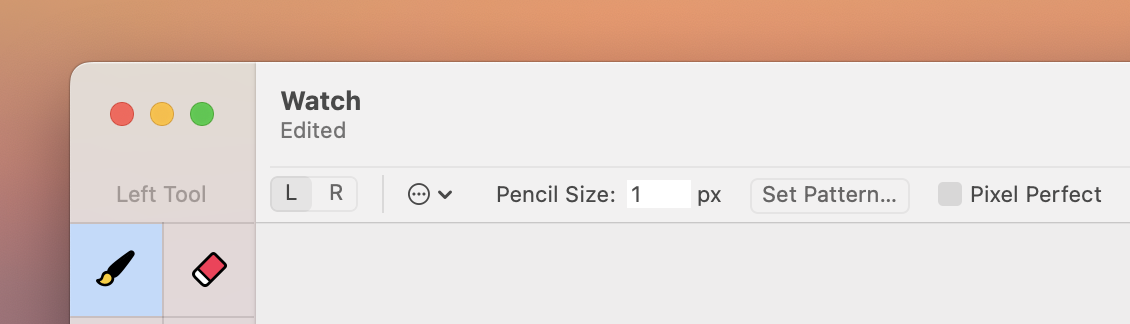
The Pencil tool allows you to draw pixels with the active color. Adjust the size parameter to change the size of the brush by typing a new value. You can also increment and decrement the value with the [ and ] keys, or by pressing the up and down arrow keys while the size field is focused. Going beyond square pixels, you can draw with a pattern. For more on patterns, see Drawing With Patterns. If you hold the Shift key while drawing with the Pencil tool, the drag will be locked in the horizontal or vertical drawing direction. If you click points in the canvas while holding the Shift key, the Pencil tool will connect the lines. The Pencil tool supports Pixel Perfect mode which, when activated, ensures the widths of any drawn paths are at most 1px.
![]() Eraser
Eraser
 Eraser
The Eraser tool works much like the Pencil tool except it erases pixels. Behaviors such as using the Shift key to lock the drawing direction also apply here.
![]() Brightness
Brightness
 Brightness
The Brightness tool will lighten the pixels you draw over by a magnitude of your choosing on the brightness scale (the V in HSV color space). If you prefer to darken pixels, you can hold the Option key while using the Brightness tool. Much like with the previous two tools, the size parameter can be adjusted.
![]() Text
Text
 Text
TextThe Text tool allows you to draw text with the active color. Since Pixen is primarily a pixel art editor, the fonts will not be anti-aliased. You have control over the font face and size, as well as styles such as Bold, Italic, or Underline. Just click in the canvas to indicate where you want to place the text, and then type. When you're done, hit the Apply button. We recommend creating a new layer for text to make it easier to edit later.
![]() Eyedropper
Eyedropper
 Eyedropper
The Eyedropper tool makes it easy to pick a color in the canvas and set it as the active fill color. You can choose whether to sample the active layer, or obtain the merged color by sampling all layers under the cursor. You can also select whether to apply the color to the left or right tool.
To quickly switch to the Eyedropper while drawing, hold the Option key while using the Pencil or Line tools.
![]() Zoom
Zoom
 Zoom
ZoomThe Zoom tool zooms the canvas in. To zoom out, hold the Option key. Note that you can also zoom the canvas with pinch gestures or the zoom slider on the bottom of document windows.
![]() Rectangular Selection
Rectangular Selection
 Rectangular Selection
The Rectangular Selection tool allows you to select a rectangle of pixels. Just click and drag. As you drag, the Info Bar will show the selection width and height in pixels. To add to an existing selection, hold the Shift key while dragging. To remove from an existing selection, hold the Option key while dragging. Click and drag the selection to move it. Note that this merely moves the selection, not the underlying pixels. To move the pixels, use the Move tool described below.
![]() Magic Wand
Magic Wand
 Magic Wand
The Magic Wand selection tool allows you to select all neighboring pixels of the one you click on that are the same color. You can choose whether you want to select all pixels in the document of that color, or just the neighboring ones, with the Only affect contiguous pixels parameter. You can also choose whether the tool will only sample pixels from the active layer (the default behavior), or the merged canvas. If you want to select neighboring pixels that are not quite the same color as the clicked one, but close enough, set the Tolerance parameter to a value greater than 0.
Much like with the Rectangular Selection tool, you can add to an existing selection by holding the Shift key. To remove from an existing selection, hold the Option key. Click and drag the selection to move it.
![]() Lasso
Lasso
 Lasso
LassoThe Lasso selection tool allows you to select a region by drawing the selection shape. Much like with the Rectangular Selection tool, you can add to an existing selection by holding the Shift key while dragging. To remove from an existing selection, hold the Option key while dragging. Click and drag the selection to move it.
![]() Move
Move
 Move
MoveThe Move tool allows you to move the selection of pixels in the active layer. If no pixels are selected, it will move the whole layer. You can hold the Shift key to lock movement to the horizontal or vertical direction.
![]() Flood Fill
Flood Fill
 Flood Fill
The Flood Fill tool lets you fill all neighboring pixels of the one you click on that are the same color. You can choose whether you want to fill all pixels in the document of that color, or just the neighboring ones, with the Only affect contiguous pixels parameter. If you want to fill neighboring pixels that are not quite the same color as the clicked one, but close enough, set the Tolerance parameter to a value greater than 0.
![]() Line
Line
 Line
LineThe Line tool allows you to draw lines of pixels. Just click and drag. You can change the stroke width using the size parameter. You can hold the Shift key to lock the drawing direction to multiples of 30 degrees.
![]() Rectangle
Rectangle
 Rectangle
The Rectangle tool allows you to draw rectangles of pixels. You can change the stroke width with the Border Width parameter. If you want to fill the shape as well, select Fill Shape. You can then pick whether to fill the shape with the active color or an alternate one. If you hold the Shift key, you can lock the drawing direction to a square. If you hold the Option key, the rectangle will be drawn from the center instead.
![]() Ellipse
Ellipse
 Ellipse
The Ellipse tool allows you to draw ellipses. You can change the stroke width with the Border Width parameter. If you want to fill the shape as well, select Fill Shape. You can then pick whether to fill the shape with the active color or an alternate one. If you hold the Shift key, you can lock the drawing direction to a perfect circle. If you hold the Option key, the ellipse will be drawn from the center instead.
Hotkeys
Shortcuts for Pixen's tools can be customized in the settings window under the Hotkeys tab. In general, selecting tools for the left mouse button is as simple as hitting a key like p for Pencil or e for Eraser. And if you do Shift - P or Shift - E the tool will get assigned to the right mouse button instead. If you hover over the tools, you can see their current hotkeys.
To learn more about Pixen or purchase the app, visit https://pixenapp.com.