Customizing Your Workspace
Now that we've covered the basics of creating and managing documents in Pixen, we'll dive more into the Pixen workspace.
Tools
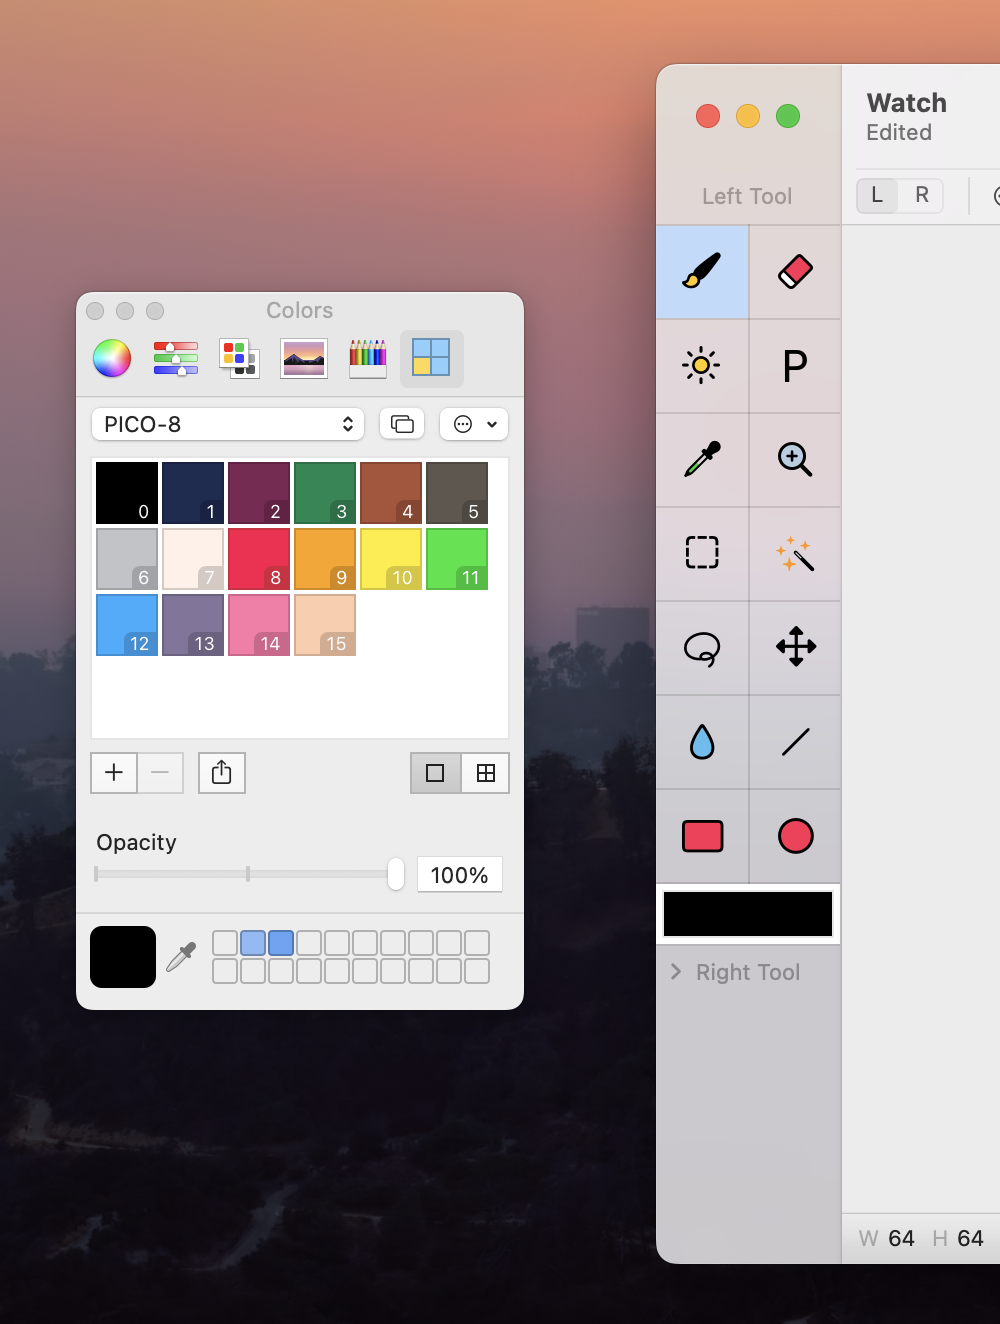
On the left of Pixen document windows, you'll find the Tools palette which contains all of Pixen's tools such as the Pencil, Eraser, Flood Fill, and more. A different tool can be assigned to the left mouse button and right mouse button. For example, you can configure Pixen to draw with the Pencil tool while holding the left mouse button and erase pixels while holding the right mouse button. To set the right tool, expand the Right Tool pane. Similarly, a different color can be assigned to the left and right tool via the color well. See the Tools section for more on Pixen's tools.
Canvas
In the middle of Pixen document windows, you'll find the canvas where all drawing takes place. Just click and drag to start drawing with the Pencil tool.
Toolbar

On the top of document windows, you'll find the toolbar with common actions for sharing documents, showing the color palette panel, and more. You'll also find properties for the selected tool. For example, for the Pencil tool, you can customize the brush width or set a drawing pattern.
The toolbar buttons can be customized by selecting Customize Toolbar from the View menu. Here, you can add additional commands that are otherwise only accessible via the Edit menu such as Scale Canvas and Resize Canvas. If you wish to hide the toolbar altogether, you can do so with the Hide Toolbar command.
Info Bar

On the bottom of document windows, you'll find the info bar. Here you can view the size of the current canvas. You can also view the X and Y coordinates of the mouse cursor in the coordinate space of the canvas. By default, the coordinate system places the origin 0, 0 on the top left. In Pixen's Settings window, you can change this to the bottom left if you prefer.
You can also view the RGBA or Hex color values of the pixel underneath the mouse cursor. If you click the double arrows, you can switch between RGBA and Hex color values.
If you do not wish to see the Info Bar, you can hide it by selecting Hide Info Bar from the View menu. You can also use the Info Bar Mode submenu to select which information you want to see in the Info Bar.
Zooming
The zoom level of the canvas can be adjusted by dragging the zoom slider. If you click the dropdown arrow by the percentage, you'll find commands to Zoom to Fit and Zoom to 100%. These can also be accessed from the View menu. Pixen also responds to the usual ⌘+ and ⌘- keyboard shortcuts which can be used to zoom the canvas in and out.
Color Picker
The macOS color picker automatically opens when opening documents. In addition to its standard functionality, Pixen adds its own color palettes tab at the end. Here you can create, organize, import, and export color palettes. For more information, see the Working With Palettes section.
If you prefer the color picker doesn't open automatically while opening documents, you can toggle the Activate left color well when opening documents option in Pixen's Settings.
Document Palettes
On the right side of document windows, you'll find the special Recent Colors and Document Colors palettes on top. The Recent Colors palette in the first tab shows you your most recently used colors so you can re-select them easily. If you click on the More button, you can also assign a custom color palette to this tab. For example, when working on a PICO-8 project, it might be useful to bring up the PICO-8 color palette here and constrain your drawing to those colors.
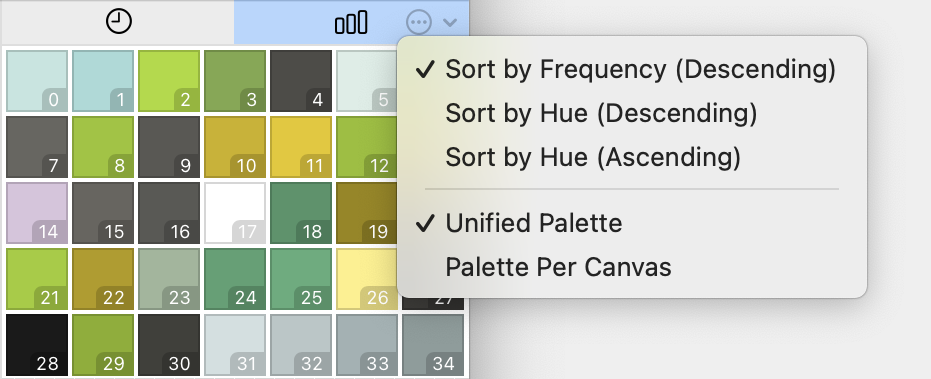
The Document Colors palette in the second tab shows you all the colors in your document ordered by frequency.
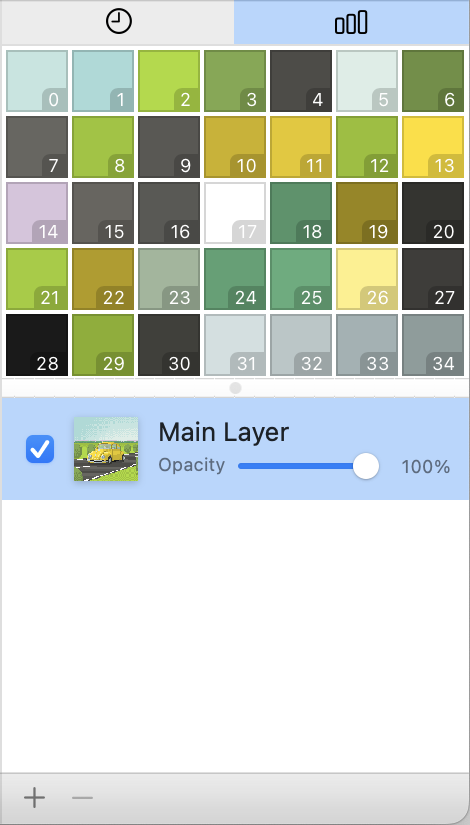
In the Document Colors view, you can replace a color by double-clicking it and selecting a different one. As you work, the Document Colors palette updates to reflect the canvas. If you prefer sorting the palette by hue instead of frequency, use the More button.
To display all your color palettes, click the Palettes button in the toolbar. For more information, see the Working With Palettes section.
Layers
Below the palettes, you'll find all the layers in your canvas. Pixen allows you to decompose your artwork into multiple layers to make editing easier. For example, when drawing a character, the body, hat, and clothes could all be drawn in separate layers. Then, if you want to reposition the hat, you can do so without affecting the rest of the drawing.
To add a new layer, click the + button. To remove one, click the - button while it's selected. To rename a layer, double-click on its name. You can also hide and show layers with the checkbox toggle, adjust opacity, and more.
See the Organizing Layers section for more.
Full Screen
Pixen supports macOS's Full Screen mode. Use the green traffic light button in document windows or the Enter Full Screen command under the Window menu to activate it.
Tabs
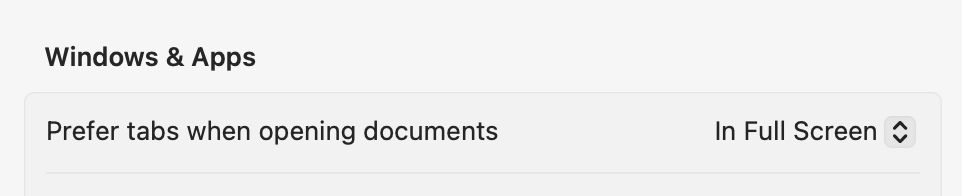
Pixen respects macOS's preferences for tab management. By default, Pixen will create new documents in new windows in regular use. In Full Screen mode, Pixen will create new documents in new tabs. To override this default system behavior, you can change the Use tabs for documents setting in Pixen's Settings to Always or Never. The former will create tabs for documents even outside of Full Screen mode. The latter will stop tabs from being created in Full Screen mode, always preferring a new window.
The Show / Hide Tab Bar commands under the View menu can be used to hide or show the tab bar when possible.
Dark Mode
Dark mode is fully supported in Pixen. By default, Pixen respects your system's theme. If you would like to force the app to always run in Dark Mode, you can do so by changing the Theme in Pixen's Settings.
To learn more about Pixen or purchase the app, visit https://pixenapp.com.